
Continue Public
Continue for AI Engineer brings chat, inline edits, autocomplete, and coding agents into the editor so you can stay in the same workflow while working with AI models.
Continue is available for various IDEs. The following IDEs are currently supported:
- Visual Studio Code
- JetBrains.
Key Features
Section titled “Key Features”- Chat interface for questions, code explanations, and development assistance
- Inline edits for targeted code changes without leaving the file
- Autocomplete for low-latency code suggestions while you type
- Coding agents for multi-step tasks such as reading files, running commands, and applying changes
Usage Guidelines
Section titled “Usage Guidelines”Installation
Section titled “Installation”Continue is currently available for Visual Studio Code and JetBrains.
- Download the Continue extension from AI Coding Plugins.
- If you are updating an existing installation, delete the old Continue extension folder from
.vscode/extensions. - In VS Code, open Extensions, open the three-dot menu, and choose Install from VSIX.
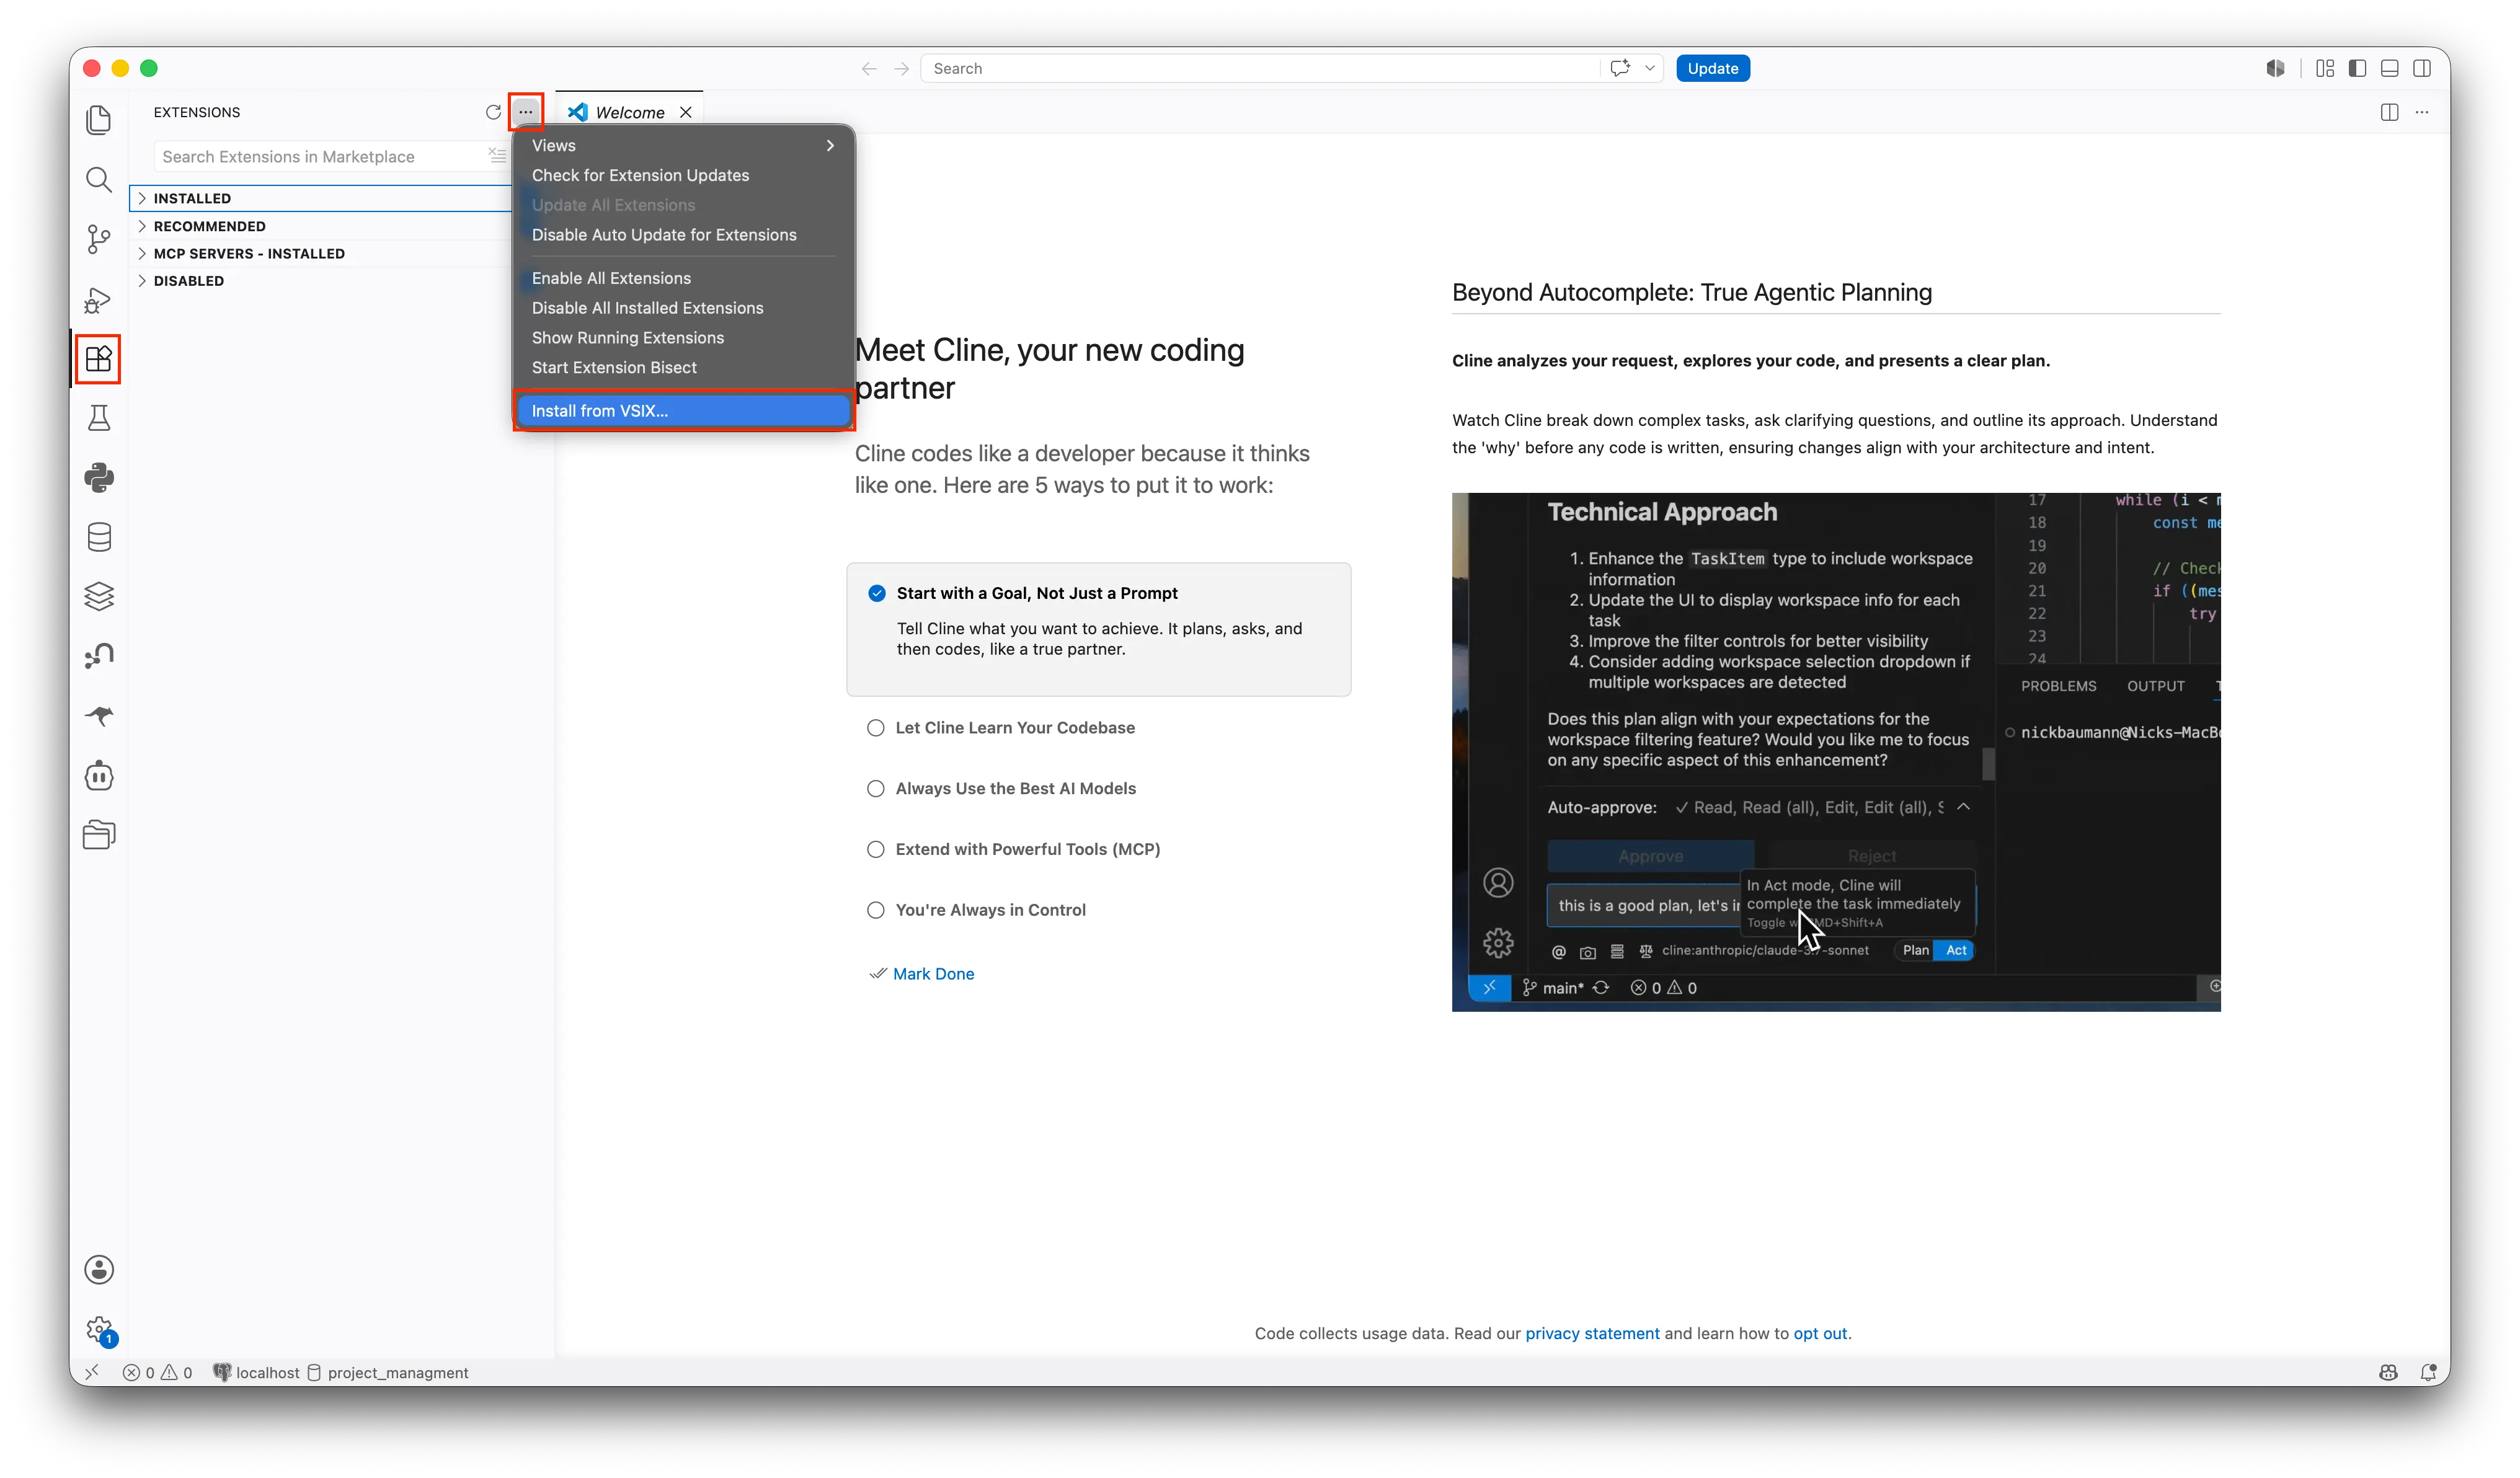
- Select the downloaded plugin file and reload Visual Studio Code.
- Download the Continue extension from AI Coding Plugins.
- If you are updating an existing installation, delete the old Continue extension folder from
.vscode/extensions. - In VS Code, open Extensions, open the three-dot menu, and choose Install from VSIX.
- Select the downloaded plugin file and reload Visual Studio Code.
- Open Settings in your JetBrains IDE and select Plugins.
- On the Plugins page, click the settings icon and choose Manage Plugin Repositories.
- In the Custom Plugin Repositories dialog, add the repository URL from AI Coding Plugins
- Click OK to save the repository list and apply the changes.
- Open Marketplace, search for Continue for AI Engineer, and install it.
- Open Settings in your JetBrains IDE and select Plugins.
- On the Plugins page, click the settings icon and choose Manage Plugin Repositories.
- In the Custom Plugin Repositories dialog, add the repository URL from AI Coding Plugins
- Click OK to save the repository list and apply the changes.
- Open Marketplace, search for Continue for AI Engineer, and install it.
Config File Setup
Section titled “Config File Setup”After the first installation, open the AI Engineer Continue plugin and choose Local config. This opens an empty config.yaml file.
The config file defines the available AI models and how they connect to the LLM service. The file is written in YAML format, so indentation is important. Always use spaces instead of tabs.
General Structure
Section titled “General Structure”name: Local Configversion: 1.0.0schema: v1models: - ...Top-Level Fields
Section titled “Top-Level Fields”| Field | Description |
|---|---|
name | The name of the configuration. Choose any descriptive name. |
version | The version of the configuration file. Update this only when maintaining different configuration versions. |
schema | The configuration schema version. This should normally remain v1. |
models | A list of AI model configurations. |
Adding a Model
Section titled “Adding a Model”Each model is defined as an entry under the models section.
Example:
- name: gpt-4.1 model: gpt-4.1 provider: openai apiBase: https://llm-server.llmhub.t-systems.net/v2/coding apiKey: ${{ secrets.OPENAI_API_KEY }} roles: - chatModel Fields
Section titled “Model Fields”| Field | Description |
|---|---|
name | A human-readable name for the model. This name is displayed to users and can be any descriptive label. |
model | The model identifier expected by the server. The value must exactly match the deployed model name. |
provider | Specifies the API provider used to access the model. For this configuration, use openai. |
apiBase | The base URL of the LLM API endpoint. E.g. https://llm-server.llmhub.t-systems.net/v2/coding if you like to purchase models from AIFS. |
apiKey | The API key used for authentication. It is recommended to reference a secret (for example, ${{ secrets.OPENAI_API_KEY }}) instead of hardcoding the key. |
roles | Defines the capabilities supported by the model. A model can support one or more roles such as chat, edit, and apply. |
Example config.yaml
Section titled “Example config.yaml”name: Local Configversion: 1.0.0schema: v1models: - name: gpt-4.1 model: gpt-4.1 provider: openai apiBase: https://llm-server.llmhub.t-systems.net/v2/coding apiKey: ${{ secrets.OPENAI_API_KEY }} roles: - chat - name: Qwen3-30B-A3B-FP8 model: Qwen3-30B-A3B-FP8 provider: openai apiBase: https://llm-server.llmhub.t-systems.net/v2/coding apiKey: ${{ secrets.OPENAI_API_KEY }} roles: - chat - edit - applyOnce the config is saved, you can start a chat and use Continue.
Using an environment variable
Section titled “Using an environment variable”The ${{ secrets.OPENAI_API_KEY }} reference resolves the value at runtime instead of pinning the API key into your config.yaml. Continue searches the following sources in order:
- A
.envfile in your workspace root .continue/.envin your workspace~/.continue/.envin your home directory- The process environment
Updating
Section titled “Updating”Automatic updated are included for Continue whenever a new version is published.
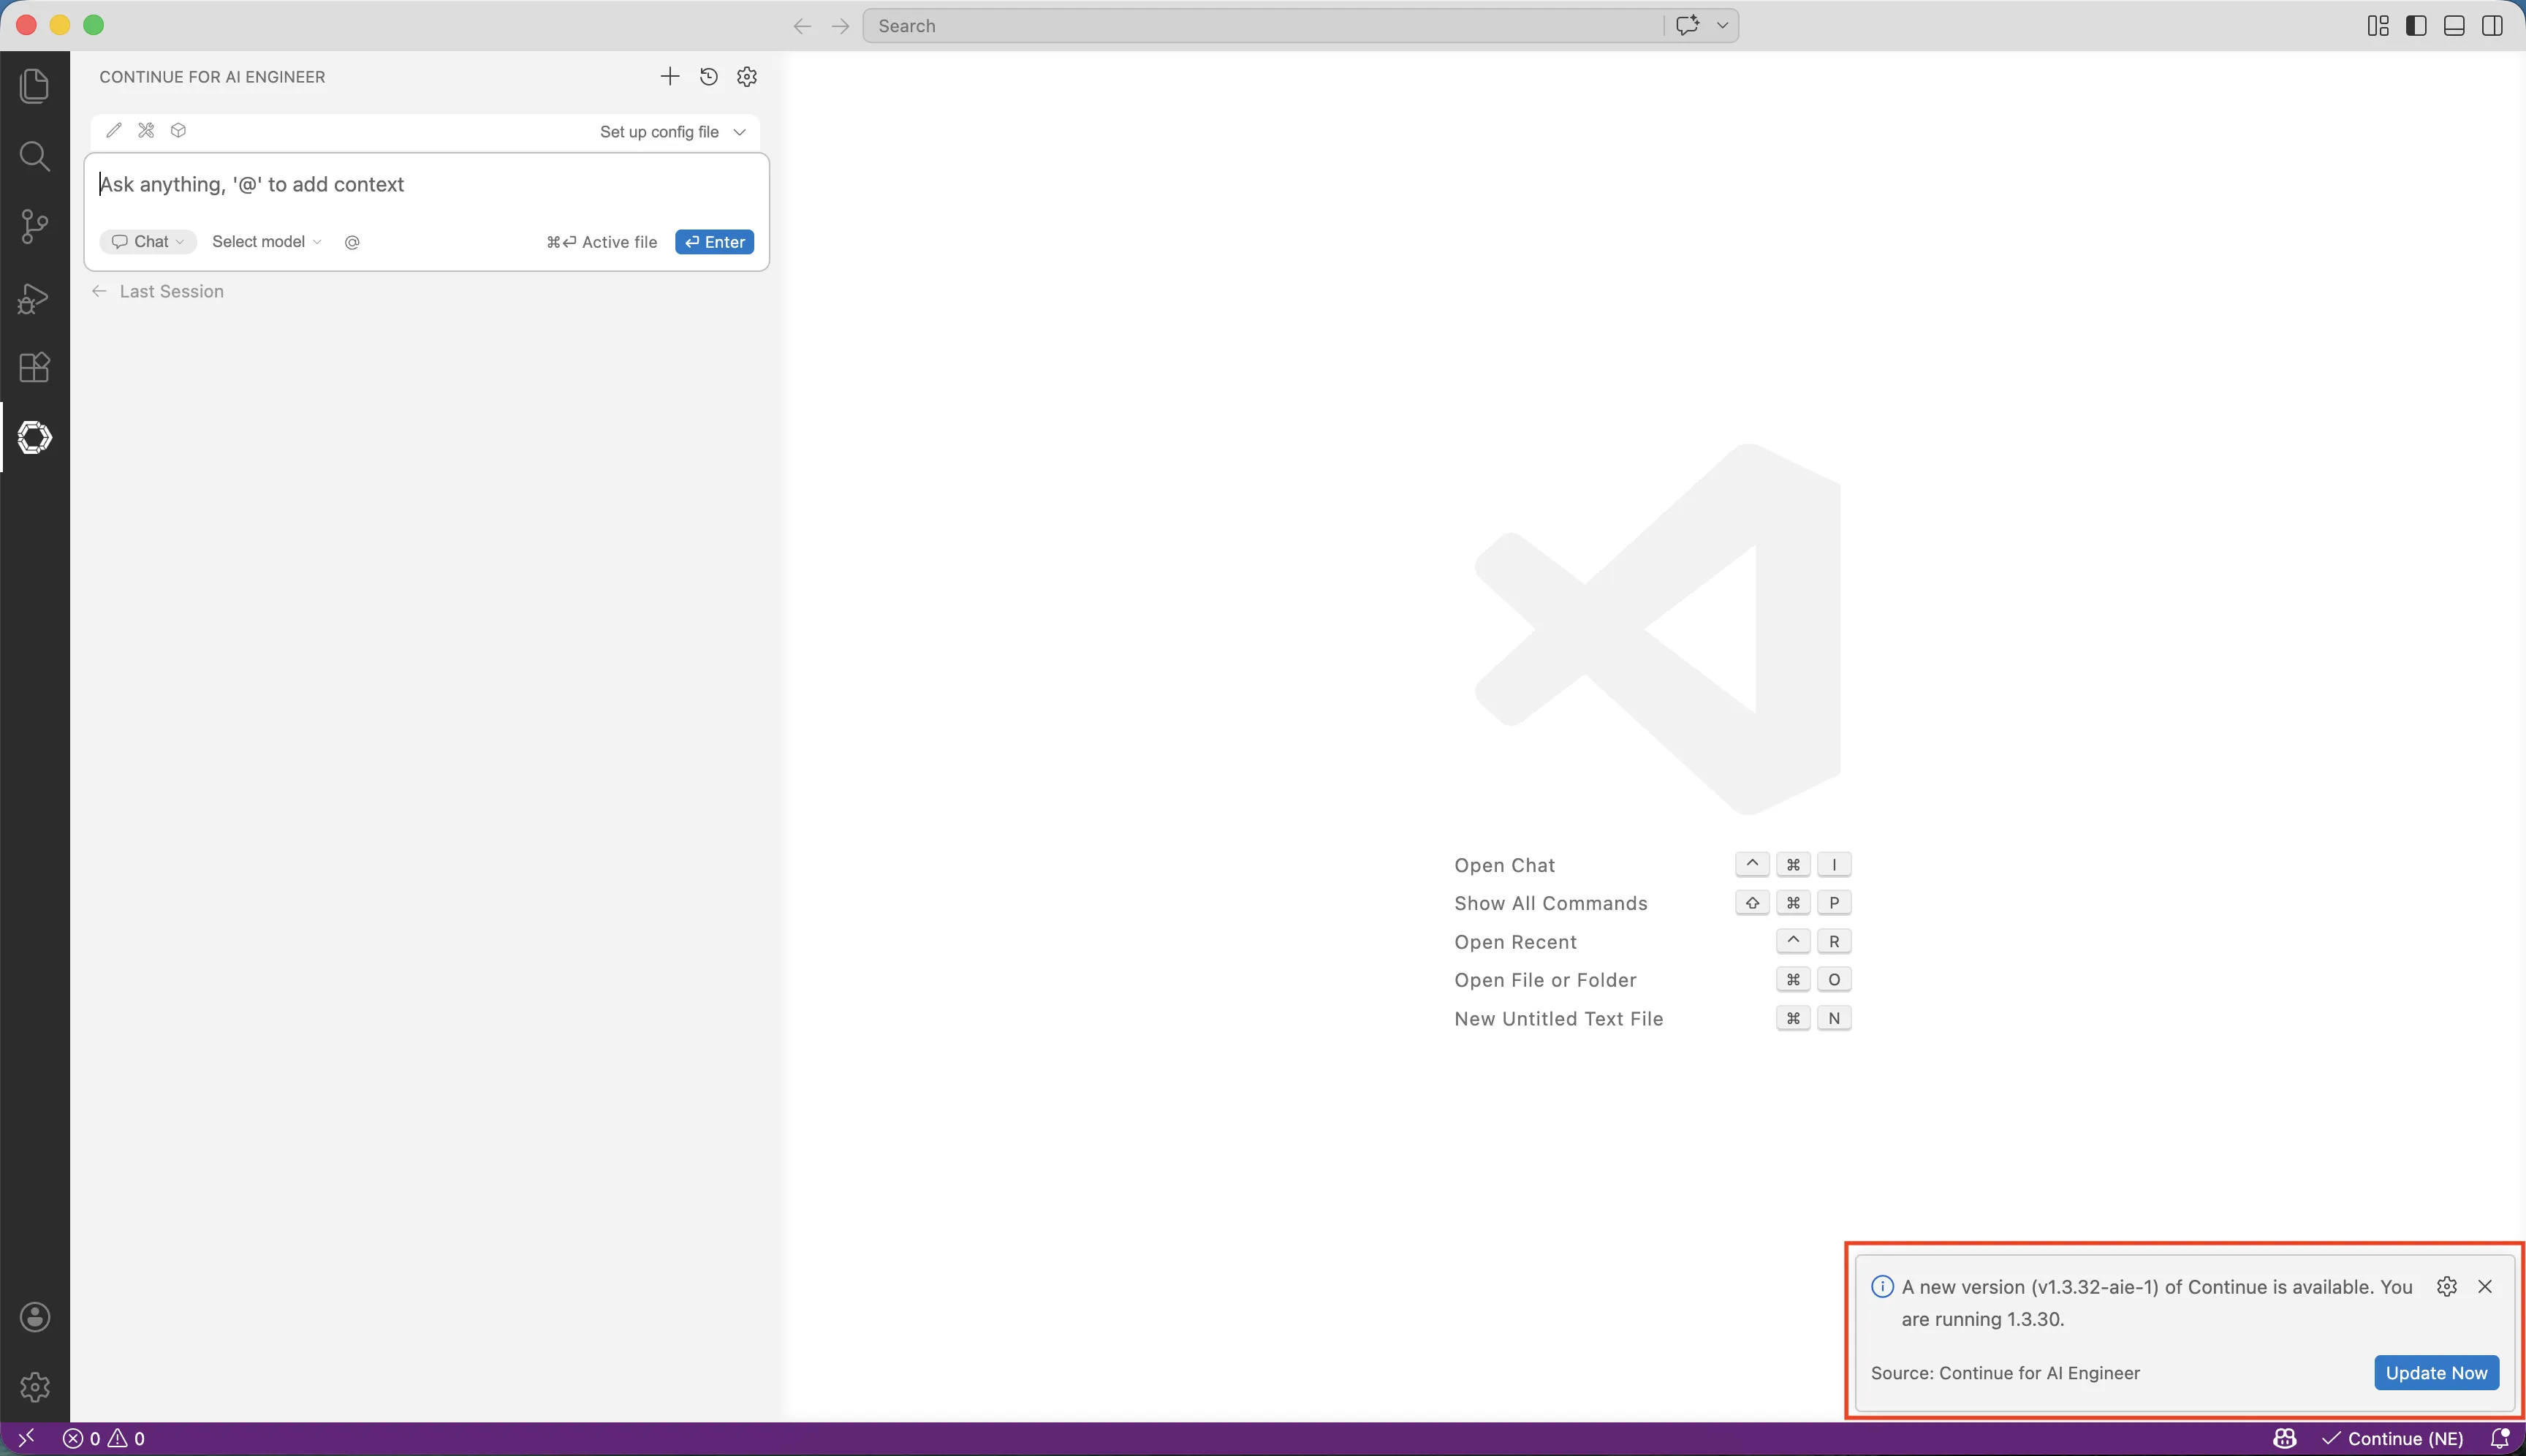
When you start or reload Visual Studio Code and an update is available, a popup appears.
-
Click Update Now to download the latest version.
-
After the download completes, click Reload Window.
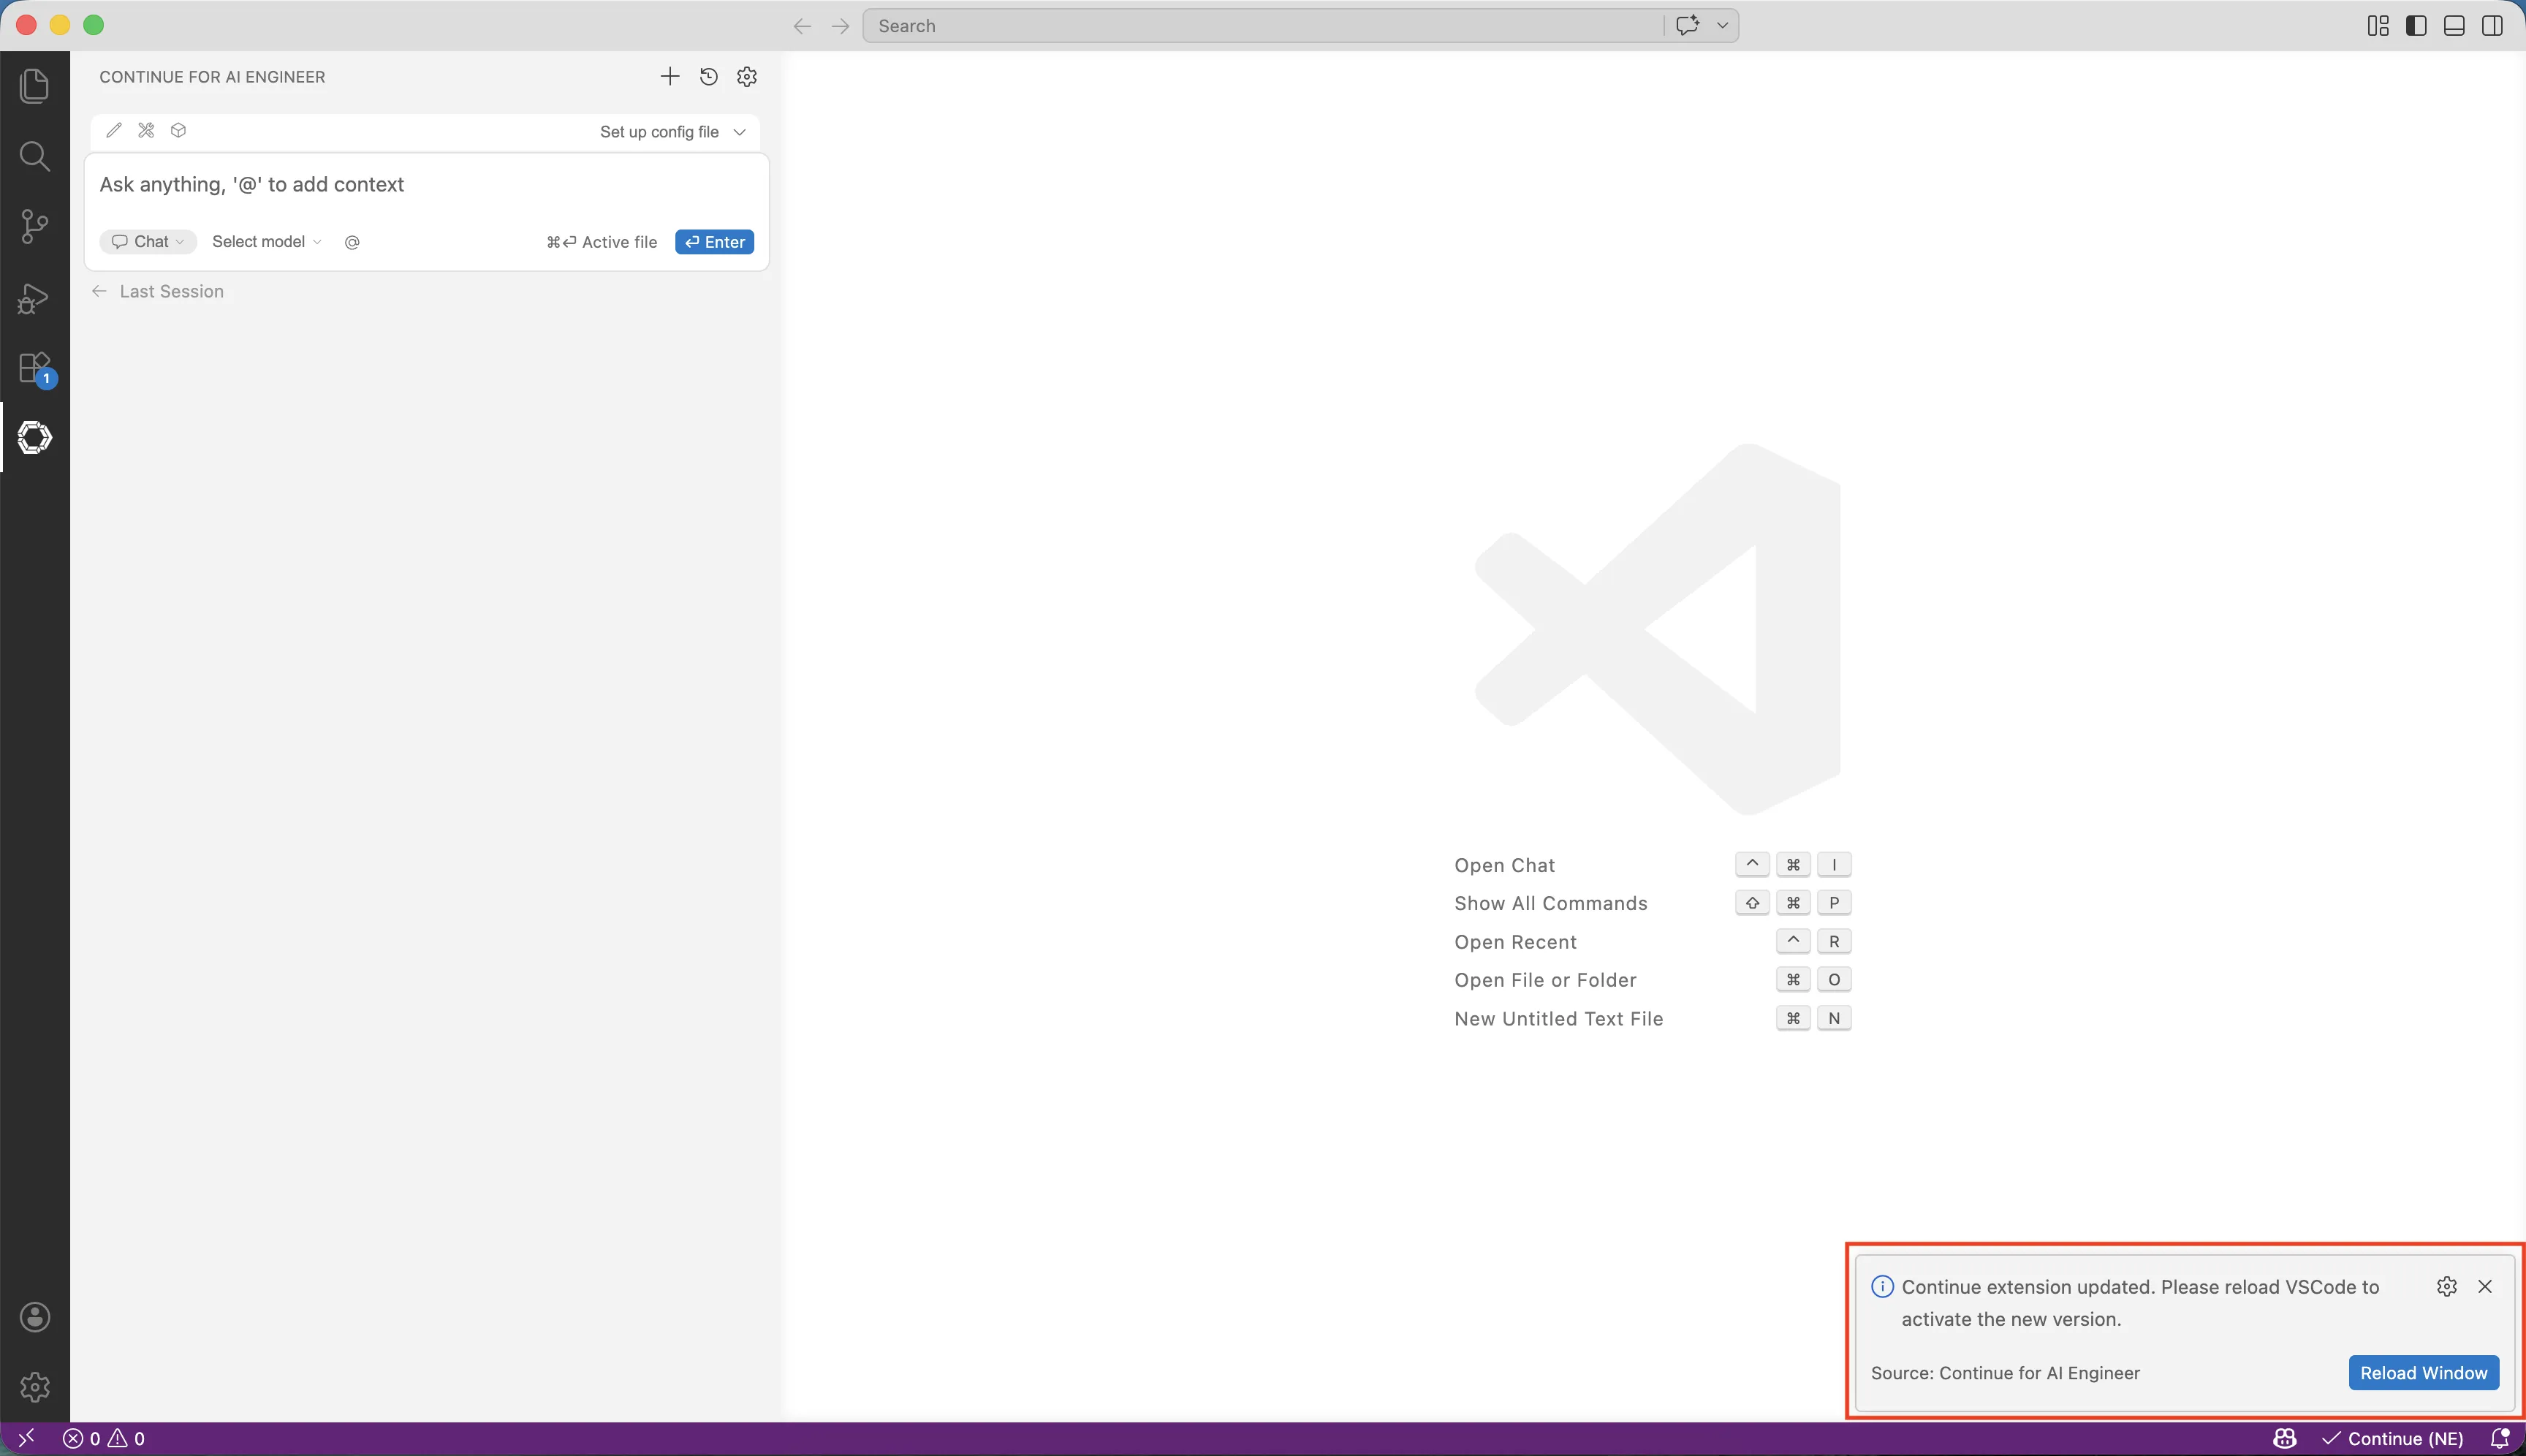
After Visual Studio Code restarts, the latest Continue version is ready to use.
When you start or reload JetBrains and an update is available, a popup appears.
You can also check manually in Settings -> Appearance & Behavior -> System Settings -> Updates.